


How a Metal Roof Installation Works, Step by Step


A metal roof installation moves through nine stages: tear-off of the old covering, deck inspection and repair, underlayment installation as a sealed secondary water barrier, drip edge and eave trim, panel layout and squaring, setting and fastening the first panel, running the remaining panels with lapped seams and sealant tape, flashing every penetration and wall intersection, and closing with ridge cap and ventilation. The sequence is broadly the same anywhere in the country. The specifications are not. Inside the High-Velocity Hurricane Zone covering Miami-Dade and Broward, the fastener type, the spacing, the embedment depth, and the compatible underlayment all come from the specific panel's product approval document rather than from general practice, and a crew that follows generic guidance produces a roof that fails inspection. Below we walk through each stage, explain what goes underneath and why, settle the recurring questions about screws and seams, cover what Florida code demands, and finish with how a building owner can tell the work was done correctly.
Key Takeaways
- Installation runs nine stages, and the panels themselves are among the last to go on.
- The High-Velocity Hurricane Zone requires a self-adhering polymer-modified bitumen underlayment applied directly to the deck as a secondary water barrier.
- Standard 15-pound or 30-pound felt on its own does not satisfy that requirement.
- Every roofing component in the zone needs a Miami-Dade Notice of Acceptance, and the approval document specifies the fastener type, spacing, and installation method.
- Deviating from the approval document voids it, which means a technically sound installation can still be non-compliant.
- Exposed fasteners generally go through the flat of the panel rather than the rib, because the flat bears on solid substrate.
- Panel laps are sealed with butyl tape inside the joint, not with caulk applied over the top of it.
- Metal panels expand and contract with temperature, so the attachment method has to allow movement rather than resist it.
How a Metal Roof Installation Works, Step by Step
A metal roof installation works through nine sequential stages, beginning with tear-off and deck preparation and ending with ridge cap, ventilation, and final inspection. Each stage depends on the one before it being finished correctly, which is why a problem introduced early tends to compound rather than stay contained.
The sequence our crews follow looks like this:
- Tear off the existing covering. Old shingles, tile, or panels come off in sections, exposing the deck so it can be seen rather than guessed at.
- Inspect and repair the deck. Soft sheathing, rotted areas, and damaged framing get replaced. Deck fastening is upgraded where the existing nailing pattern falls short of current requirements.
- Install the underlayment. A self-adhering membrane goes down across the full deck, laps sealed, forming a continuous secondary water barrier.
- Set the eave and rake trim. Drip edge, eave closure, and gable trim go on before any panel, because the panels lap over them.
- Lay out and square the roof. Chalk lines establish the panel run square to the roof rather than square to the fascia, which is the measurement most installations get wrong.
- Set and fasten the first panel. The first panel establishes the line every subsequent panel follows, so it is checked, rechecked, and only then fastened.
- Run the remaining panels. Each panel laps or locks into the last, with butyl sealant tape inside the lap and fasteners placed to the approved pattern.
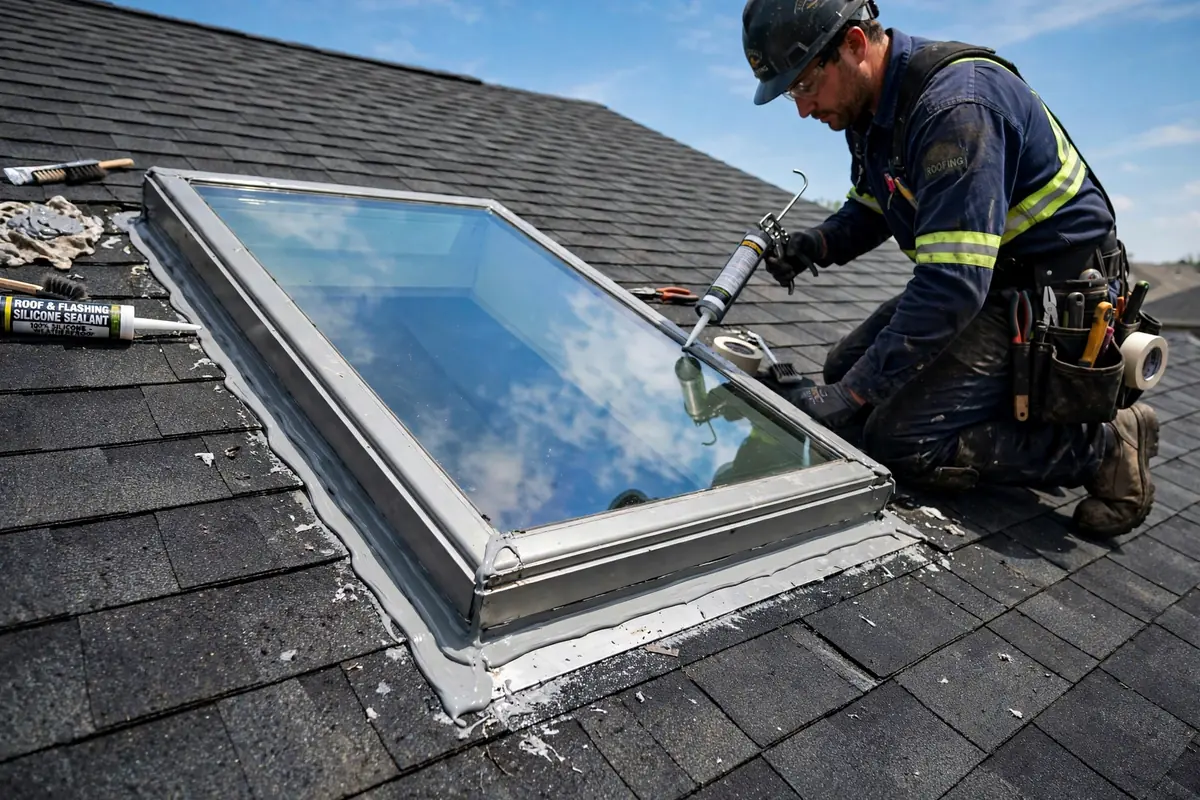
- Flash every penetration and wall intersection. Pipe boots, vents, skylights, chimneys, valleys, and sidewalls all get flashed, and this is where most metal roofs eventually leak if the work was rushed.
- Close the ridge and finish ventilation. Closure strips, ridge vent, and ridge cap complete the assembly, followed by cleanup and the final inspection that closes the permit.
Notice how much happens before a single panel is set. Four of the nine stages are preparation, and the durability of the finished roof is decided largely in those four. We approach metal roof installation the same way on every project because shortcuts taken under the panels stay invisible until they are expensive.
What Happens Before the First Panel Goes On?
Before the first panel goes on, the old covering comes off, the deck gets inspected and repaired, the deck fastening gets evaluated against current requirements, and the underlayment and edge trim go down. A metal panel is only as sound as the surface it is attached to.
Deck condition is the first real decision point of any reroof. Plywood or OSB that has taken on moisture, delaminated, or softened around old fastener holes will not hold a new fastener at its rated withdrawal value, and that value is what the wind uplift calculation assumed. Sheathing gets replaced rather than patched over wherever it fails a probe.
Deck attachment matters as much as deck condition. Homes built decades ago were nailed to standards well below what applies today, and a reroof is the only practical moment to correct that, since the deck is exposed exactly once. Upgrading deck fastening also affects what a wind mitigation inspector can verify afterward, which has consequences for insurance credits.
Anything planned to sit on the roof later should be discussed now rather than after. Rooftop equipment, skylights, and future solar all interact with panel choice and layout, and coordinating them across our wider roofing services avoids penetrating a new roof six months after it goes on.
Should You Put Underlayment Under a Metal Roof?
Underlayment goes under every metal roof, and inside the High-Velocity Hurricane Zone it is a code-required secondary water barrier rather than an optional layer. The panels shed the great majority of water. The underlayment handles what gets past them, and over a thirty-year service life something always does.
Florida's requirement in the zone is specific. A self-adhering polymer-modified bitumen membrane goes directly onto the deck, covering the full surface with laps sealed and fully bonded, typically a minimum of four inches at horizontal seams and six inches at vertical ones. Standard 15-pound or 30-pound felt on its own does not meet the requirement. An alternative compliance path pairs 30-pound felt installed with nails and tin-tabs beneath an approved self-adhering polymer-modified bitumen cap sheet.
Self-adhering material earns its place mechanically as well as legally. As each fastener drives through it, the rubberized asphalt closes around the shank, so the layer that is supposed to stop water is not perforated hundreds of times by the layer above it. Felt held down with cap nails cannot do that.
Underlayment failures show up years later and rarely announce themselves as underlayment failures. A slow stain on a ceiling, a damp truss, a musty smell in an attic, all trace back through the panels to a barrier that was never continuous. That is one of the more common findings when we are called out for roof repair on a metal roof that is otherwise in good condition.
What Is the Best Thing to Put Under a Metal Roof?
The best material to put under a metal roof is a high-temperature rated self-adhering underlayment. The temperature rating is the part that gets overlooked and the part that matters most under metal.
Heat builds in the cavity between a metal panel and the deck to levels that standard self-adhered membranes are not formulated for. A membrane rated for ordinary use can soften, and softened adhesive migrates, loses bond, and can weep at the laps. High-temperature formulations hold their properties through that heat cycle for the service life of the roof.
Compatibility is the second consideration and it is not a matter of preference. The panel's product approval names which underlayments the assembly was tested with, and using a different one, even a better one on paper, puts the installation outside the approval.
Do You Put a Moisture Barrier Under a Metal Roof?
A moisture barrier goes under a metal roof, and on a code-compliant Florida installation the self-adhering underlayment serves that function. The terms secondary water barrier, moisture barrier, and underlayment get used interchangeably in conversation, and in this assembly they describe the same layer doing the same job.
Condensation is the separate concern people are usually asking about. Warm humid air reaching a cool metal underside will condense, and in a vented attic assembly the ventilation manages it. In an unvented or conditioned assembly, insulation placement and vapor control have to be designed rather than assumed, since getting that wrong puts liquid water inside the roof without a single leak being present.
Do You Need an Air Gap Under a Metal Roof?
An air gap is not required under every metal roof, though a vented cavity created with battens improves thermal performance and helps manage condensation. Direct-to-deck installation over a self-adhered underlayment is common, code-compliant, and appropriate for most Florida homes.
Where a gap is used, it comes from battens run horizontally over the underlayment with counter-battens beneath them so air can move from eave to ridge. That cavity lets radiant heat vent out rather than conduct into the deck, and it gives any incidental moisture a drying path.
Attic ventilation is a separate system and it is the one that is actually required. Net free ventilating area is calculated at a ratio of 1/150 of the attic floor area, or 1/300 where the vents are properly distributed between high and low points or where a vapor retarder is present. Ridge and soffit venting working together is what makes either ratio function. Bathroom exhaust terminations do not count toward it. How this plays out through the year is something we cover in our look at metal roof performance across seasons.
Is a Drip Edge Necessary on a Metal Roof?
A drip edge is necessary on a metal roof, and it goes on before the panels because the panels lap over it. Its job is to carry water off the edge of the roof and into the gutter instead of letting it run back underneath the panel and onto the fascia.
Surface tension is the reason it exists. Water running off a panel edge will curl back along the underside if nothing breaks that path, and over years that wets the fascia, the sheathing edge, and eventually the framing. The drip edge projects the water clear.
Sequencing is where installations go wrong. At the eave the drip edge typically goes over the underlayment, and at the rake it goes under, so that every layer sheds onto the layer below it. Reversing either one creates a path inward rather than outward. Different profiles carry different edge details, and the specifics vary across the metal roof options a homeowner can choose from.
How Does the First Panel Get Set?
The first panel gets set square to the roof rather than square to the fascia, positioned from a chalked control line and checked before a single fastener goes in. Every panel after it inherits whatever the first one establishes.
Old roofs are rarely square. Fascia boards sag, ridges are not perfectly parallel to eaves, and framing settles over decades. An installer who sets the first panel flush to the fascia on an out-of-square roof transfers that error into every following panel, and by the far end of the run the ribs are visibly out of alignment with the ridge and the last panel needs cutting to an awkward taper.
The correct approach starts with measuring the roof itself, snapping control lines perpendicular to the eave, and setting the first panel to those lines. Where the structure is genuinely out of square, the discrepancy gets distributed in small increments across many panels instead of accumulating in the last one. That decision takes an extra half hour at the start and is invisible afterward, which is precisely why rushed installations skip it.
Should Metal Roof Screws Go on the Rib or Flat?
Metal roof screws generally go through the flat of the panel rather than the rib, because the flat bears directly on the substrate and gives the fastener something solid to compress against. Most exposed-fastener panel manufacturers specify the flat for that reason.
The mechanics are straightforward. A screw driven through the flat pulls the panel down against the deck or purlin, and the sealing washer compresses evenly between two solid surfaces. A screw driven through the rib spans an air gap, so tightening it either leaves the washer under-compressed or crushes the rib and dimples the panel. Neither outcome seals reliably, and both create a stress point that works loose as the panel expands and contracts.
One qualification matters more than the general rule. The controlling instruction is the panel's own approval document and manufacturer specification, not general practice, and some profiles are tested and approved differently. Standing seam systems avoid the question entirely by using concealed clips instead of exposed fasteners, which is one reason standing seam roofs tend to outlast exposed-fastener systems.
How Do Installers Keep Screws Straight on a Metal Roof?
Installers keep screws straight by chalking fastener lines across the panels before driving anything and by working to those lines rather than by eye. On an exposed-fastener roof the screws are permanently visible, so alignment is both a performance issue and an appearance one.
Depth control matters alongside alignment. Drivers get set with a depth stop so every fastener seats the washer to the same compression. An overdriven screw crushes the washer and dimples the panel, which pools water around the head. An underdriven screw leaves the washer uncompressed and the joint open. Both fail, and they fail from opposite directions.
Should Metal Roof Screws Be Sealed?
Metal roof screws should not need additional sealant, because the bonded washer on a correctly driven fastener is the seal. Sealant applied over screw heads on a new roof is usually a sign that the fasteners were driven badly rather than a sign of extra care.
The washer is engineered for the job. It compresses to a designed thickness and stays elastic through decades of thermal cycling. Caulk applied over the head does not bond reliably to a painted panel, cracks under ultraviolet exposure, and traps moisture underneath once it fails.
Aging roofs are a different case. Washers eventually harden and shrink, and the correct remedy at that point is replacing the fasteners with slightly larger diameter screws and fresh washers, not sealing over the old ones.
Should Metal Roof Seams Be Caulked?
Metal roof seams should be sealed with butyl sealant tape placed inside the lap during assembly, not with caulk applied over the outside of a finished seam. The seal belongs within the joint where it stays compressed and protected.
Butyl tape works because it never fully cures. It stays permanently pliable, so as the panels expand and contract with temperature the tape moves with them and maintains contact. Exterior caulk cures rigid, then cracks at the first significant thermal cycle, and a cracked bead sheds water into the seam rather than away from it.
Caulk on the outside of a seam is a useful diagnostic when looking at an existing roof. It usually means either the tape was omitted during installation or a leak developed and someone treated the symptom. Different panel systems handle their seams differently, and profiles such as metal tile roofing use interlocking geometry that changes where the sealing happens.
How Is the Bottom Edge of a Metal Roof Sealed?
The bottom edge of a metal roof is sealed with foam or metal closure strips shaped to the panel profile, seated on sealant tape and set behind the drip edge. Corrugated and ribbed panels leave open voids at the eave, and those voids are an entry point for wind-driven rain, insects, and small animals if nothing fills them.
Closure strips are cut to match the exact panel profile so they fill each void completely. A generic strip that approximates the shape leaves gaps at every rib, which defeats the purpose. Placement matters too, since a closure set too far forward blocks drainage and one set too far back leaves the void open.
Some panel systems eliminate the problem instead of closing it. A hemmed eave folds the panel edge back on itself and locks it to a cleat, which closes the profile and secures the edge against uplift at the same time. Wind pressure concentrates at roof edges more than anywhere else, so how the eave is finished carries real structural weight rather than just keeping water out.
What Does Florida's Code Require for Metal Roof Installation?
Florida requires metal roof assemblies to carry a current product approval, to be installed exactly to that approval's specifications, to include a secondary water barrier, and to pass staged inspections under a pulled permit. Requirements tighten considerably inside the High-Velocity Hurricane Zone covering Miami-Dade and Broward.
Sources: Florida Building Code, Building, 8th Edition; Miami-Dade County Product Control; Florida Building Commission hurricane mitigation provisions; Florida Office of Insurance Regulation wind mitigation inspection form OIR-B1-1802.
The approval document is the part homeowners rarely hear about and the part that governs everything. It names the maximum design wind pressure the assembly was tested to, the approved installation methods, the compatible underlayments, and the permitted fasteners. Installing outside any of those parameters voids the approval, which means a roof can be built carefully and still be non-compliant. Buildings in Doral sit inside the zone, and every assembly we install there is built to the approval document rather than to habit, with those documents kept on site through code-compliant metal roofs from dry-in to final.
Inspection timing shapes the schedule as much as the work does. The deck inspection happens before underlayment, the dry-in inspection before panels, and the final inspection after completion, and each one has to be scheduled and passed in sequence. Anyone planning a project timeline should factor that in, which we break down further in our overview of permits and inspections.
What Not to Do When Installing a Metal Roof
The recurring errors on metal roof installations are overdriven fasteners, panels squared to the fascia instead of the roof, caulk substituted for butyl tape, generic fastener spacing, and no allowance for thermal movement. Almost every one of them is invisible on the day the crew leaves and expensive three years later.
- Overdriving or underdriving fasteners. A crushed washer dimples the panel and pools water. An uncompressed washer never seals. Depth-set drivers prevent both.
- Squaring to the fascia. Old roofs are rarely square, and setting the first panel to a sagging fascia transfers the error across the entire run.
- Caulk instead of butyl tape. Exterior caulk cures rigid and cracks at the first thermal cycle. The seal belongs inside the lap.
- Generic fastener spacing. Spacing taken from a manufacturer's general guide instead of the approval document produces a roof outside its own approval.
- Mixing incompatible metals. Steel fasteners in aluminum panels, or copper components against galvanized steel, drive galvanic corrosion at every point of contact.
- Ignoring thermal movement. Metal expands and contracts measurably along a panel run, and a system fastened rigidly at both ends will oil-can, elongate its holes, and loosen.
- Cutting panels with an abrasive saw. The hot filings embed in the finish and rust, leaving orange freckling across a new roof. Shears or nibblers avoid it.
- Walking panels carelessly. Foot traffic in the wrong place dents flats and crushes ribs, and the damage is permanent.
- Skipping closure strips. Open eave and ridge voids admit wind-driven rain and pests into an otherwise sound assembly.
- Leaving the permit open. An uninspected roof surfaces later at sale, refinance, or insurance renewal.
Thermal movement deserves particular attention because it is the least intuitive item on that list. A long panel run grows and shrinks measurably between a February morning and an August afternoon, and systems designed for that movement use clips or slotted attachment that let panels slide. Systems that fight it fail at the fasteners. Anyone weighing a roof that will also carry equipment should think about it early, a subject we address alongside metal roof systems and rooftop solar.
How Can You Tell a Metal Roof Was Installed Correctly?
A correctly installed metal roof shows even fastener lines, uniform washer compression with no dimpling, straight ribs parallel to the rake, tight closures at eave and ridge, and no exterior caulk anywhere on the finished surface. Most of it is visible from the ground with a decent pair of binoculars.
Work through the visible signals in order. Fastener rows should run straight and evenly spaced, and each head should sit flush with a slightly compressed washer rather than sunk into a dimple. Panel ribs should stay parallel to the rake from eave to ridge, and a rib that drifts out of parallel means the layout was off from the first panel. Closures should be visible and complete at eave and ridge, filling every profile void. Flashings at pipes, walls, and valleys should be formed metal rather than sealant. Fresh caulk on a new roof is a finding rather than a finish.
The documentation matters as much as the appearance. A completed job should leave you with the product approval numbers for every component, the closed permit and passed inspection records, and separate warranty documents for the material and the workmanship, since those two carry different terms and the labor term is usually the shorter one. Ours are published rather than buried in fine print, and any contractor should hand over the full set at closeout alongside their warranty coverage.
Homeowners across South Florida who are unsure whether an existing roof was done properly can have it assessed rather than guessed at. An inspection reads the fastener pattern, the closures, and the flashing details against what the approval document required, and that comparison is the only reliable answer. Where the findings point to a system that was compromised from the start, a planned metal roof replacement costs less over twenty years than repeated repairs to an installation that was never right.
Frequently Asked Questions
Will Spray Foam Stop Water Leaks in a Metal Roof?
Spray foam does not properly stop water leaks in a metal roof, and it usually makes the underlying problem harder to fix. Foam sprayed over a leaking seam or fastener conceals the source, holds moisture against the panel, and accelerates corrosion underneath where nobody can see it. It also has to be removed before any real repair can happen. Correcting the fastener, the closure, or the flashing that is actually leaking is the durable fix.
What Causes Most Metal Roof Problems?
Most metal roof problems trace to installation rather than to the material. Overdriven fasteners, missing or degraded washers, flashing formed poorly at penetrations, and inadequate allowance for thermal movement account for the large majority of leaks and premature failures. The panels themselves routinely outlast the details around them, which is why installer selection matters more on a metal roof than product selection does.
Can You Install a Metal Roof Over Shingles in Florida?
Installing a metal roof over existing shingles is possible in some Florida jurisdictions but uncommon inside the High-Velocity Hurricane Zone, where the assembly would need an approval specific to that substrate condition. A recover also leaves the existing deck and its original fastening in place, which means the deck attachment cannot be upgraded and a secondary water barrier cannot be added underneath. Most HVHZ projects tear off for that reason.
How Long Does a Metal Roof Installation Take?
A typical residential metal roof installation takes several days to a week on site depending on roof size, complexity, and the number of penetrations, though the full project including permitting, material lead time, and inspections runs considerably longer. Complex roofs with multiple valleys, dormers, and hips take substantially more time per square foot than simple gable runs. Staged inspections also have to be scheduled and passed between phases.
Do Metal Roofs Need Ventilation?
Metal roofs need attic ventilation the same as any other roof covering, calculated at a net free ventilating area ratio of 1/150 of the attic floor area, or 1/300 where vents are properly distributed or a vapor retarder is present. Ridge and soffit vents working as a pair are what make the system function, since intake without exhaust moves no air. Bathroom and kitchen exhaust terminations do not count toward the required area.
What Is a Notice of Acceptance for a Metal Roof?
A Notice of Acceptance is a Miami-Dade County product approval certifying that a specific roof assembly passed the required wind uplift and water infiltration testing. It states the maximum design pressure, the approved installation method, the compatible underlayments, and the permitted fasteners for that exact configuration. Installing outside those parameters voids the approval, so the document governs the installation rather than merely accompanying it.
What Matters Most
A metal roof installation is nine stages, and four of them happen before a panel is set. Tear-off, deck repair, underlayment, and edge trim decide how the roof performs; the panels mostly decide how it looks. Fasteners go through the flat because the flat bears on something solid. Seams are sealed with butyl tape inside the lap because the tape stays pliable and caulk does not. The first panel is squared to the roof rather than the fascia because every panel after it inherits that line. None of these are matters of opinion, and all of them are visible afterward to someone who knows where to look.
What separates a Florida installation from a generic one is that the specifications are not general. The panel's approval document names the fastener, the spacing, the embedment, and the compatible underlayment, and building outside it voids the approval even when the work looks correct. Inside Miami-Dade and Broward a self-adhering secondary water barrier is required, standard felt alone will not satisfy it, and the deck, dry-in, and final inspections each have to pass in sequence before the permit closes.
If you are planning a metal roof anywhere across South Florida, or you want to know whether the one already on your house was built to its approval, the team at ASP SuperHome is glad to walk it with you and show you what to look for.
Reach us any time through our contact us page.
Meet With a Project Manager
Your first conversation is with a Project Manager who takes the time to understand your goals, walk you through your options, and stays connected throughout your project — from the initial consultation through the final walkthrough.
.avif)
.avif)
.avif)
%201.avif)
Insights & Resources
Stay informed with expert tips on roofing materials, hurricane codes, repairs, and South Florida construction standards.


%201.avif)
%201%20(1).avif)
%201.svg)
%201%20(1)%20(1).png)
.png.png)
.png%20(1).png)
.png%20(2).png)
.avif)
.avif)


.png)
.svg)
.png)