


How to Install Standing Seam Metal Roof Step by Step
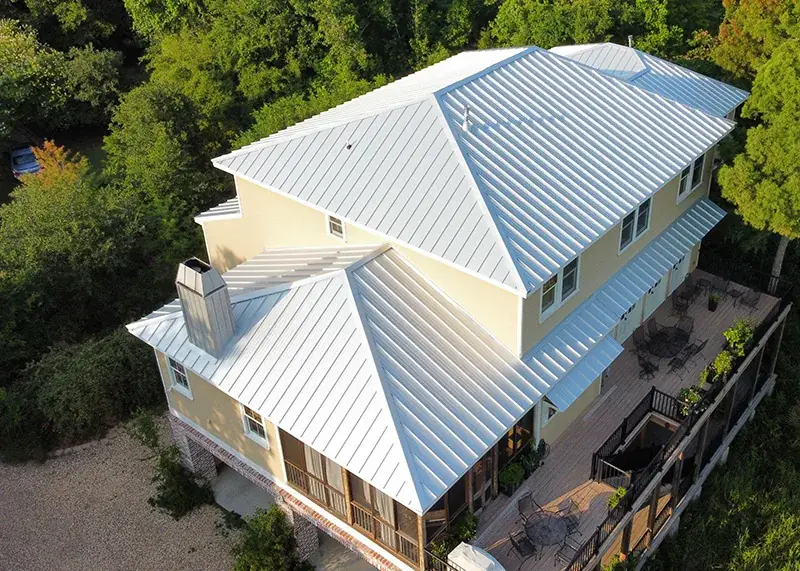

A standing seam metal roof is installed by securing interlocking metal panels to the roof deck using concealed clips, with raised seams that lock together to create a continuous waterproof surface with no exposed fasteners. The installation process involves preparing the roof deck, laying underlayment, installing drip edge and starter trim, setting panels from one end of the roof to the other, and finishing with ridge cap, rake trim, and hip flashing. Standing seam metal roofing costs $10 to $18 per square foot installed for steel or aluminum and lasts 40 to 70 years, making it one of the most durable and weather-resistant residential roofing systems available. This guide covers the complete installation process, what goes underneath the panels, how much it costs, and why professional installation produces the best long-term result.
Key Takeaways
- Standing seam metal roofing uses concealed clips and interlocking raised seams that eliminate exposed fasteners, removing the most common leak point found on traditional metal roofs.
- Installation follows a specific sequence: roof deck preparation, underlayment, drip edge, panel layout, panel attachment via concealed clips, and finishing with ridge cap, rake trim, and hip flashing.
- Standing seam costs $10 to $18 per square foot installed for steel or aluminum, with total project costs of $20,000 to $36,000 for a typical 2,000 square foot home, according to Angi and Modernize 2026 data.
- The system lasts 40 to 70 years, compared to 15 to 30 years for asphalt shingles, according to the National Roofing Contractors Association (NRCA).
- Standing seam metal roofs reduce cooling costs by 20 to 30% in warm climates by reflecting solar heat rather than absorbing it, according to the Metal Roofing Alliance.
- Professional installation is strongly recommended because standing seam requires specialized tools (mechanical seamers cost $2,000+), precise panel alignment, and proper flashing techniques.
- In hurricane zones, standing seam panels withstand wind speeds of 140 to 160 mph when installed with code-compliant clips and fastener schedules.
What Is a Standing Seam Metal Roof?
A standing seam metal roof is an interlocking metal panel system with raised seams that connect adjacent panels without any exposed screws or fasteners on the roof surface. The raised seams, which typically stand 1 to 2 inches above the flat panel surface, are spaced 12 to 18 inches apart depending on the panel profile. Each panel locks into the adjacent panel at the seam, and concealed clips attached to the roof deck hold the panels in place from underneath. The result is a continuous metal surface where no screw heads, nail heads, or penetration points are visible on the field of the roof.
This concealed fastener design is what separates standing seam from exposed fastener metal roofing systems like R-panel and corrugated metal. Exposed fastener systems use screws driven directly through the metal surface into the deck below. Over time, the rubber EPDM (Ethylene Propylene Diene Monomer) washers around those screws degrade under UV exposure, creating leak points that require maintenance at the 15 to 20 year mark. Standing seam eliminates this failure point entirely, which is one of the primary reasons it lasts 40 to 70 years with minimal maintenance.
Two main seam types exist in standing seam systems. Snap-lock panels click together by hand during installation and work well on roofs with a pitch of 3:12 or steeper. Mechanically seamed panels require a special seaming tool that crimps the seam edges together on the roof, creating a tighter seal suited for lower-slope applications (as low as 1:12 or 2:12 depending on manufacturer specifications). Both seam types produce a weathertight connection, but mechanically seamed systems offer superior performance in high-wind and heavy-rain environments.
How Is a Standing Seam Metal Roof Attached?
A standing seam metal roof is attached to the roof deck using concealed clips that are screwed into the deck beneath the panel seams, allowing the panels to expand and contract with temperature changes without creating stress points or fastener-hole leaks. Each clip grips the bottom edge of one panel and is covered by the overlapping seam of the adjacent panel, so no fastener penetrates the visible surface of the roof.
The clip-based attachment method serves two critical functions. First, it creates a floating connection that accommodates thermal expansion and contraction. Metal panels expand when heated and contract when cooled; on a hot day in South Florida, a 20-foot steel panel can expand by nearly 1/4 inch. Fixed-point fasteners would resist this movement and eventually warp the panel or enlarge the screw holes. Concealed clips allow the panel to slide slightly at each clip point, preventing buckling and maintaining the flat, clean appearance of the roof surface.
Second, the clip system positions all fastener penetrations below the waterproof plane of the interlocking seams. Water running down the roof surface passes over the raised seams without encountering any screw holes, which is why standing seam systems have the lowest leak rate of any metal roofing option available.
How to Install a Standing Seam Metal Roof Step by Step
Installing a standing seam metal roof follows a specific sequence of steps: preparing the roof deck, installing underlayment, setting drip edge and starter trim, laying panels from one end to the other, seaming or snapping panels together, and finishing with ridge cap, rake trim, and hip or valley flashing. Each step must be completed correctly before the next one begins, because the layers build on each other to create the waterproof assembly.
- Inspect and prepare the roof deck. The plywood or oriented strand board (OSB) decking must be smooth, dry, and structurally sound. Replace any rotted, delaminated, or damaged sections. In Florida, the deck must be re-nailed to current Florida Building Code fastener schedules before any roofing material is installed.
- Install underlayment. Lay synthetic underlayment across the entire deck surface, starting at the eave and working upward with each course overlapping the one below by at least 4 inches. In High Velocity Hurricane Zone (HVHZ) areas, a peel-and-stick secondary water barrier is required on top of the standard underlayment to prevent water intrusion if the metal panels are displaced during a storm.
- Install drip edge and eave trim. Secure metal drip edge along the eaves and rakes. The drip edge directs water away from the fascia board and into the gutter system. Fasten it with roofing nails or screws spaced per manufacturer specifications.
- Snap chalk lines for panel layout. Measure from a fixed reference point and snap chalk lines on the underlayment to guide panel placement. Keeping the first panel perfectly square with the eave is critical, because any alignment error compounds across every subsequent panel.
- Install the first panel. Position the first panel along the chalk line with the hemmed bottom edge hooked over the drip edge. Fasten the panel's screw flange (the non-interlocking edge) to the deck using the manufacturer's specified fasteners and spacing.
- Install concealed clips and subsequent panels. Attach concealed clips along the seam side of the installed panel at the spacing specified by the manufacturer (typically 12 to 24 inches on center). Slide the next panel into position, engaging its lock edge with the clips and the previous panel's seam edge. For snap-lock systems, press down firmly until the seam clicks into place. For mechanically seamed systems, run the seaming tool along the seam to crimp the connection.
- Continue across the roof. Repeat the clip-and-panel sequence across the entire roof surface. Measure every 4 to 5 panels to verify alignment with the eave. If the panels drift out of square, adjust the top or bottom edge of the next panel before fastening to correct the alignment.
- Cut and fit panels at hips and valleys. At hips, cut each panel to match the angle of the hip line. At valleys, install valley flashing first, then cut panels to terminate 3 inches from the valley center with butyl tape sealant along the cut edge for a watertight seal.
- Install ridge cap. After all field panels are in place, install vented ridge cap along the peak to close the top of the roof while allowing attic ventilation. The ridge cap overlaps the top edges of the panels on both sides and is sealed with closure strips and fasteners.
- Install rake trim, hip cap, and wall flashing. Finish all exposed edges with the appropriate trim profiles. Rake trim covers the gable ends, hip cap covers the hip ridges, and wall flashing seals any transition between the roof and a vertical wall surface.
Every component in this sequence works together to create a continuous weatherproof system. Skipping or shortcutting any step compromises the integrity of the entire assembly. This is why we strongly recommend professional installation for standing seam metal roofing; the precision required at each stage is significantly higher than what standard shingle replacement demands.
What Goes Under Standing Seam Metal Roofing?
Under standing seam metal roofing, the system consists of the structural roof deck (plywood or OSB), synthetic underlayment, and in hurricane zones, a peel-and-stick secondary water barrier. These layers work together to provide structural support, moisture protection, and a smooth surface for the metal panels to rest on.
Synthetic underlayment has replaced traditional felt paper as the standard for metal roof installations because it resists tearing during installation, sheds water more effectively, and withstands UV exposure during the period between underlayment installation and panel installation without degrading. In South Florida, the Florida Building Code requires underlayment rated for the specific wind zone of the property, and HVHZ areas require the additional peel-and-stick membrane that seals the deck against water intrusion even if the primary roofing material is removed by extreme wind.
Some standing seam installations also include a ventilation layer between the underlayment and the metal panels, typically achieved with a furring strip or batten system. This air gap reduces heat transfer from the sun-heated metal into the attic space and prevents condensation from forming on the underside of the metal panels during temperature swings.
Does a Standing Seam Metal Roof Need to Be Vented?
Yes, a standing seam metal roof needs to be vented to prevent moisture buildup, reduce heat accumulation in the attic, and extend the life of both the roofing material and the roof structure. Proper ventilation involves intake air entering through soffit vents at the eaves and exhaust air exiting through a ridge vent at the peak, creating continuous airflow that carries heat and moisture out of the attic space.
Without adequate ventilation, warm moist air from the living space rises into the attic and condenses on the cooler underside of the metal panels. Over time, this condensation drips onto insulation and framing, promoting mold growth and wood rot. The combination of a vented ridge cap and soffit intake provides the balanced airflow that prevents these problems. In warm climates, proper attic ventilation also reduces cooling costs by preventing the attic from becoming an oven that radiates heat downward into the living space.
Do You Use Drip Edge With Metal Roofing?
Yes, you use drip edge with metal roofing, and most building codes require it. Drip edge is a metal strip installed along the eaves and rakes of the roof that directs water away from the fascia board and into the gutter system. Without drip edge, water running off the bottom of the metal panels can wick back under the panel edge and saturate the fascia, soffit, and roof deck edge. Drip edge also provides a clean, finished appearance at the roof's lower edge and gives the hemmed bottom of the standing seam panel a solid surface to hook onto during installation.
Should Metal Roof Seams Be Caulked?
No, the field seams on a standing seam metal roof should not be caulked because the interlocking seam design creates a mechanical weathertight connection that does not rely on sealant. Sealant degrades faster than the metal panels and would create a maintenance liability on an otherwise low-maintenance system. However, sealant is used at specific transition points: where panels terminate at valleys, walls, chimneys, and other flashing intersections. At these points, butyl tape sealant or compatible caulk provides the flexible waterproof seal between dissimilar components. A licensed contractor understands where sealant is required and where it would cause problems.
How Much Does a Standing Seam Metal Roof Cost?
A standing seam metal roof costs $10 to $18 per square foot installed for steel or aluminum in 2026, with total project costs of $20,000 to $36,000 for a typical 2,000 square foot home. Premium materials like copper range from $20 to $40 per square foot. The installed cost includes panels, clips, trim, underlayment, labor, and standard flashing, according to Angi and Modernize 2026 data.
Roofing System
Cost Per Sq Ft (Installed)
Lifespan
50-Year Total Cost*
Standing Seam (Steel)
$10 - $16
40 - 70 years
$10 - $16/sq ft (1 installation)
Standing Seam (Aluminum)
$11 - $17
40 - 70 years
$11 - $17/sq ft (1 installation)
Exposed Fastener Metal
$7 - $12
25 - 40 years
$10.50 - $24/sq ft (1-2 installations)
Architectural Asphalt Shingles
$4 - $8
15 - 30 years
$8 - $24/sq ft (2-3 installations)
Standing Seam (Copper)
$20 - $40
80 - 100+ years
$20 - $40/sq ft (1 installation)
Sources: Metal Roofing Alliance (2026), Angi/Modernize (2026), FoxHaven Roofing (2026), NRCA, RoofingCalculator.com. *50-year cost assumes replacement at end of lifespan; does not include maintenance or inflation.
The 50-year cost comparison reveals the long-term economics of standing seam. Asphalt shingles cost $4 to $8 per square foot per installation cycle but require 2 to 3 replacements over 50 years, pushing the cumulative cost to $8 to $24 per square foot. Standing seam metal costs $10 to $16 once and requires no replacement within that same 50-year window. The higher upfront investment pays for itself through avoided replacement cycles, lower maintenance, and reduced energy costs over the roof's service life.
Is a Standing Seam Metal Roof Worth It?
Yes, a standing seam metal roof is worth it for homeowners who plan to stay in their home for 15 years or longer, because the extended lifespan, reduced maintenance, energy savings, and insurance benefits offset the higher upfront cost within that timeframe. The Metal Roofing Alliance reports that metal roofs reduce cooling costs by 20 to 30% in warm climates by reflecting solar radiation rather than absorbing it into the attic space. In areas with high electricity rates and year-round air conditioning demand, that energy savings alone can total $200 to $500 per year.
Insurance carriers in Florida and other hurricane-prone states offer meaningful premium reductions for metal roofs with documented wind resistance ratings. A standing seam installation paired with a wind mitigation inspection documents the roof's concealed fastener system, roof shape, and roof-to-wall connections, which together qualify the homeowner for credits on the windstorm portion of their premium.
When the standing seam roof is combined with impact windows and reinforced opening protection, the total insurance savings can exceed $1,000 per year in coastal areas. Homeowners who complete all wind mitigation categories on the OIR-B1-1802 form maximize the combined credits and achieve the lowest available windstorm premium from their carrier.
For homeowners who plan to sell within 5 to 10 years, the resale value benefit of a standing seam metal roof is real but the full payback may not materialize before the sale. In that scenario, exposed fastener metal or premium architectural shingles may deliver a better balance of upfront cost and resale appeal.
What Is a Cheaper Alternative to Standing Seam Metal Roof?
A cheaper alternative to standing seam metal roof is exposed fastener metal panels (R-panel or corrugated), which cost $7 to $12 per square foot installed and last 25 to 40 years. Exposed fastener systems install faster and cost less per square foot, but the screw-through-metal design creates maintenance requirements at the 15 to 20 year mark when the rubber washers around the fasteners begin to degrade. Metal tile roofing offers another mid-range option that replicates the appearance of traditional tile with the lighter weight and faster installation of metal, though it uses exposed or semi-concealed fasteners rather than the fully concealed clip system of standing seam.
What Is the Life Expectancy of a Standing Seam Metal Roof?
The life expectancy of a standing seam metal roof is 40 to 70 years for steel and aluminum systems, and 80 to 100 years or more for copper and zinc, according to the National Roofing Contractors Association (NRCA) and the Cool Metal Roofing Coalition. The concealed fastener design is the primary reason standing seam outlasts exposed fastener metal by 15 to 30 years; without screw penetrations through the panel surface, the most common failure point on metal roofs simply does not exist.
Panel coating quality also affects lifespan. PVDF (Polyvinylidene Fluoride) coatings, marketed under brand names like Kynar 500 and Hylar 5000, resist fading, chalking, and corrosion for 30 to 40 years. Standard polyester coatings cost less but show visible color change and surface degradation within 10 to 15 years of UV exposure. For homeowners who want the full 50 to 70 year performance from their standing seam system, PVDF-coated panels are the standard specification.
In coastal environments, aluminum panels outperform steel because aluminum does not rust when exposed to salt air. Steel panels coated with Galvalume (a zinc-aluminum alloy) resist corrosion well in most climates but can show early corrosion within 5 miles of saltwater if the coating is scratched or cut edges are not properly sealed. For properties along the South Florida coast, aluminum standing seam is the recommended material for maximum service life.
Can You Install Standing Seam Metal Roof Over Shingles?
Yes, you can install a standing seam metal roof over existing shingles in some cases, but it depends on local building codes, the condition of the existing roof, and the number of shingle layers already in place. Most building codes allow a maximum of two roofing layers, so if you already have one layer of shingles, installing metal over the top is typically permitted. If two or more layers exist, a full tear-off is required before the metal installation can proceed.
Installing over shingles saves $1,000 to $3,000 in tear-off and disposal costs, but it prevents the installer from inspecting the roof deck for rot, delamination, or structural damage. A compromised deck beneath a new metal roof creates problems that are expensive to fix after the metal is already installed. In Florida, the building code requires deck re-nailing on every re-roof, which necessitates removing the existing material to access the deck surface. For this reason, most Florida roof repair and replacement projects include a full tear-off regardless of whether the code technically allows an overlay in a specific jurisdiction.
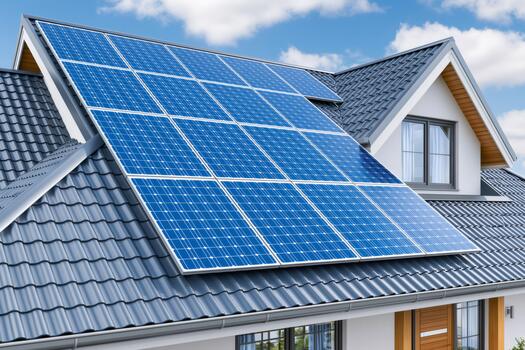
The best practice for a standing seam installation is a full tear-off that allows complete inspection and preparation of the deck. This approach adds cost upfront but eliminates the risk of hidden deck damage that compromises the 40 to 70 year investment in the metal roof above it. Pairing a new standing seam roof with solar panels at the time of installation avoids the need to remove and reinstall solar equipment during a future roof replacement, since the standing seam system will outlast the 25 to 30 year lifespan of most solar panel warranties.
Frequently Asked Questions
How Far Apart Are the Seams on a Standing Seam Metal Roof?
The seams on a standing seam metal roof are typically 12 to 18 inches apart, measured from the center of one raised seam to the center of the next. The most common residential panel widths are 12 inch, 16 inch, and 18 inch profiles. Narrower panels create more seams per foot of roof width, which produces a more pronounced vertical line pattern. Wider panels create a smoother, more contemporary appearance with fewer seam lines. Panel width does not significantly affect performance; the choice is primarily aesthetic.
Is It Okay to Walk on a Standing Seam Metal Roof?
Yes, it is okay to walk on a standing seam metal roof, but only on the flat pan area between the raised seams and only while wearing soft-soled shoes. Walking directly on the raised seams can dent or deform them, which may compromise the seam's waterproof connection. During installation and maintenance, roofers step on the flat sections and avoid placing concentrated weight on the seam ridges. Standing seam panels are more walkable than tile roofs (which crack under foot traffic) but less forgiving than asphalt shingles.
Do You Need an Air Gap Under a Metal Roof?
An air gap under a metal roof is recommended but not always required by code. The air gap, created by installing furring strips or battens between the underlayment and the metal panels, reduces heat transfer into the attic and prevents condensation from forming on the underside of the metal. In hot climates, the air gap can reduce attic temperatures by 10 to 15 degrees Fahrenheit, which lowers cooling costs and extends the life of the underlayment beneath the metal. Many roofing contractors include this ventilation layer as standard practice on standing seam installations.
What Are the Disadvantages of a Standing Seam Roof?
The primary disadvantages of a standing seam roof are higher upfront cost compared to shingles, longer installation time (2 to 3 times longer than asphalt), and the need for specialized tools and experienced installers. Standing seam also produces noise during heavy rain unless a solid roof deck with underlayment is beneath it, and denting can occur from large hail or falling debris, though the dents are cosmetic and do not compromise the waterproof seal. For homeowners who weigh these factors against the 40 to 70 year lifespan, minimal maintenance, and energy savings, the long-term value typically outweighs the upfront disadvantages.
How Long Does It Take to Install a Standing Seam Metal Roof?
Installing a standing seam metal roof takes 3 to 7 days for most residential homes, compared to 1 to 3 days for asphalt shingle installation. The longer timeline reflects the precision required for panel alignment, clip spacing, seam engagement, and trim fabrication. Complex roofs with multiple hips, valleys, dormers, and skylights take longer because each transition point requires custom-cut panels and detailed flashing work. A metal roof installation on a simple gable roof finishes faster than one on a multi-plane hip roof with the same total square footage.
What Tools Are Needed to Install Standing Seam Metal Roof?
The tools needed to install a standing seam metal roof include aviation snips (left, right, and straight), a cordless drill with driver bits, a rivet gun, cleat benders, a tape measure, chalk line, level, and safety harness with roof brackets. Mechanically seamed systems also require a powered seaming machine that costs $2,000 or more. This specialized equipment requirement, combined with the precision needed for panel alignment and flashing work, is the primary reason professional installation is recommended over DIY attempts for standing seam roofing.
What It All Comes Down To
A standing seam metal roof is the most durable, weather-resistant, and low-maintenance residential roofing system available. The concealed clip attachment, interlocking raised seams, and absence of exposed fasteners create a roof surface that resists wind, rain, and thermal stress for 40 to 70 years without the leak-prone penetration points that limit other metal roofing systems. The installation demands precision at every step, from deck preparation through final trim, and the specialized tools and training required make professional installation the clear path to a roof that performs to its full potential.
If you are considering a standing seam metal roof for your home, ASP Super Home has been installing metal roofs across South Florida since 2006 with licensed, in-house crews and no subcontractors. Call 786-933-9815 or request a free estimate to discuss panel options, material selection, and what to expect from start to finish.
Meet With a Project Manager
Your first conversation is with a Project Manager who takes the time to understand your goals, walk you through your options, and stays connected throughout your project — from the initial consultation through the final walkthrough.
.avif)
.avif)
.avif)
%201.avif)
Insights & Resources
Stay informed with expert tips on roofing materials, hurricane codes, repairs, and South Florida construction standards.


%201.avif)
%201%20(1).avif)
%201.svg)
%201%20(1)%20(1).png)
.png.png)
.png%20(1).png)
.png%20(2).png)
.avif)
.avif)


.png)
.svg)
.png)