


How to Repair Roof Leak before It Gets Worse
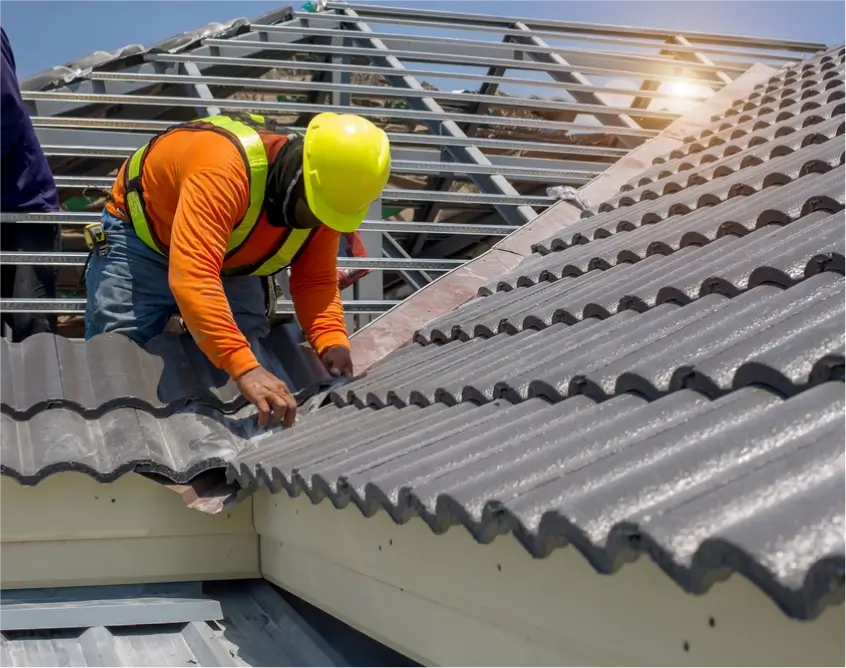

A roof leak needs to be repaired as quickly as possible because mold begins growing on damp surfaces within 24 to 48 hours of water exposure, according to the Environmental Protection Agency (EPA). What starts as a small drip from a cracked piece of flashing or a missing shingle can escalate into thousands of dollars in structural damage, insulation replacement, and mold remediation within a matter of days. The good news is that most roof leaks are repairable without a full roof replacement, and catching them early keeps repair costs between $150 and $1,500 for the majority of homeowners. This guide covers how to find the source of a leak, what to do immediately to limit damage, when a repair is enough versus when a replacement makes more sense, and how to prevent leaks from happening in the first place.
Key Takeaways
- Mold begins growing within 24 to 48 hours of water exposure, and structural wood rot can begin within days of continuous moisture, according to EPA guidelines and restoration industry data.
- Most roof leak repairs cost $150 to $1,500, while the secondary damage from a neglected leak (mold remediation, wood rot, interior repairs) can cost $3,000 to $10,000 or more.
- The six most common causes of roof leaks are damaged flashing, missing or cracked shingles, deteriorated pipe boots, clogged valleys, worn chimney seals, and aging underlayment.
- Temporary fixes like tarps and roofing sealant buy time but do not replace a permanent repair by a licensed contractor.
- Homeowners insurance typically covers roof leaks caused by sudden storm damage but denies claims for leaks caused by neglect or deferred maintenance.
- In humid climates, the mold timeline accelerates because indoor relative humidity is already elevated, making immediate action even more critical.
- Annual roof inspections catch small issues before they become expensive emergencies, especially before and after storm season.
How Long Can a Roof Leak Before It Causes Damage?
A roof leak can cause damage within 24 to 48 hours because mold spores, which are already present in every indoor environment, begin germinating on any damp surface within that window. According to the EPA, mold growth starts on moist building materials like drywall, insulation, and wood framing within one to two days of water exposure. By 72 hours, mold colonies establish themselves and begin spreading through enclosed spaces like attic cavities and wall interiors.
The damage timeline accelerates beyond mold. Continuous moisture softens plywood roof decking within days, weakening the structural layer that supports your roofing material. Wet insulation loses its thermal resistance immediately and does not recover even after drying, which means your energy bills increase while the leak persists. Drywall absorbs water and begins to sag, crumble, and stain within the first week. Electrical wiring exposed to water creates a fire hazard. According to Paul Davis Restoration, the cost difference between repairing a leak discovered in the first few hours versus one left undiscovered for two weeks can be 10 times or more.
In South Florida's subtropical climate, the mold timeline is even shorter. Indoor relative humidity routinely exceeds 60% without mechanical dehumidification, which means building materials are already closer to the moisture threshold where mold activates. A roof leak in this environment introduces water into spaces that are already humid, creating conditions where visible mold colonies can appear within 24 hours rather than the 48-hour standard cited in drier climates.
What Causes a Roof to Leak?
The most common causes of a roof leak are damaged flashing, missing or cracked shingles, deteriorated pipe boots, clogged roof valleys, worn chimney seals, and aging underlayment. Each of these failure points allows water to penetrate the roofing system's protective layers and reach the roof deck, insulation, or interior structure below.
- Damaged flashing: Flashing consists of thin metal strips installed at joints, edges, and penetrations (chimneys, skylights, vents, walls) to direct water away from vulnerable seams. Wind, thermal expansion, and corrosion cause flashing to lift, crack, or separate over time, creating gaps where water enters. Flashing failure is the leading cause of roof leaks, according to multiple roofing industry sources.
- Missing or cracked shingles: High winds, hail, falling debris, and ultraviolet degradation cause shingles to crack, curl, or blow off entirely. Even a single missing shingle exposes the underlayment and decking beneath it to direct water contact.
- Deteriorated pipe boots: Pipe boots are the rubber or neoprene seals around plumbing vent pipes that penetrate the roof surface. The rubber degrades under UV exposure and thermal cycling, cracking within 8 to 12 years on most roofs. A cracked pipe boot is one of the easiest and least expensive leaks to repair, but one of the most commonly overlooked.
- Clogged roof valleys: Valleys are the V-shaped channels where two roof planes meet. Debris buildup in valleys slows water drainage, causing water to pool and seep under the shingle edges on either side of the valley line.
- Worn chimney seals: The junction between a chimney and the roof surface relies on a combination of step flashing, counter flashing, and sealant. As sealant ages, it shrinks, cracks, and pulls away from the chimney surface, allowing water to run down the chimney and into the roof structure.
- Aging underlayment: The underlayment is the waterproof barrier between your roofing material and the plywood deck. Older felt underlayment deteriorates faster than modern synthetic alternatives, especially in hot climates where UV radiation penetrates through shingle gaps and breaks down the felt material.
How Do You Find Where a Roof Is Leaking?
You find where a roof is leaking by tracing the water stain on your ceiling upward through the attic, following the moisture path along rafters and decking to the point of entry, and then inspecting the corresponding exterior roof area for visible damage. Water rarely drips straight down from the point of entry. It travels along rafters, sheathing, and pipes before dropping onto the ceiling below, which means the stain on your ceiling may be several feet away from the actual leak source.
- Start inside. Go into the attic with a flashlight during or immediately after a rain event. Look for wet spots, water trails, discolored wood, or daylight showing through the roof deck. Mark the location of any moisture with a marker or tape.
- Trace the water path upward. Follow wet streaks along rafters and sheathing toward the highest point of moisture. Water flows downhill along the underside of the roof deck, so the highest wet point is closest to the actual entry point.
- Measure the distance. From the attic, measure the distance from the suspected entry point to a fixed reference (a vent pipe, chimney, or exterior wall). Use that measurement to locate the same spot on the exterior roof surface.
- Inspect the exterior. Look for cracked, curled, or missing shingles; lifted or separated flashing; cracked pipe boots; debris-filled valleys; or damaged seals around chimneys and skylights. The damage is usually visible once you know where to look.
- Use the hose test if it is not raining. Have someone spray a garden hose on one section of the roof at a time while you watch from the attic. When water appears inside, you have isolated the section containing the leak.
If you cannot safely access your attic or roof, a professional roof inspection identifies the source using thermal imaging, moisture meters, and visual assessment without requiring the homeowner to climb onto the roof.
What to Do With a Leak While Waiting for a New Roof?
While waiting for a new roof, contain the water inside with buckets or containers, cover the exterior leak area with a waterproof tarp secured with boards or sandbags, and remove or protect any belongings in the affected area to prevent secondary damage. These steps do not fix the leak, but they limit interior damage and buy time until a contractor can complete the permanent repair or replacement.
If the ceiling is bulging from pooled water, carefully puncture the lowest point of the bulge with a screwdriver or awl and place a bucket beneath it. Allowing the water to drain in a controlled manner prevents the weight of the pooled water from collapsing a larger section of ceiling, which causes far more damage than a controlled release. After draining, outline the edge of the water stain with a marker and write the date next to it. If the stain grows past the line, the leak is still active and worsening.
On the exterior, a heavy-duty polyethylene tarp (at least 6 mil thickness) draped over the damaged section and extending at least 4 feet past the leak in every direction provides temporary protection from rain. Secure the tarp with 2x4 boards or sandbags placed along the edges and over the ridge. Do not nail or screw through the tarp into the roof, because the punctures create additional entry points for water after the tarp is removed.
How Do You Fix a Leaking Roof Without Replacing It?
You fix a leaking roof without replacing it by repairing the specific component that is allowing water to enter, whether that is a cracked piece of flashing, a missing shingle, a deteriorated pipe boot, or a failed sealant joint. Most roof leaks originate from a single failure point, and repairing that point restores the roof's waterproof integrity without touching the rest of the system. A targeted roof repair costs a fraction of a full replacement and extends the roof's service life by years when the remaining material is still in good condition.
Flashing repairs involve removing the damaged section, cleaning the substrate, and installing new flashing with proper overlap and sealant. Shingle repairs involve lifting the surrounding shingles, removing the damaged piece, sliding a new shingle into position, and securing it with roofing nails covered by sealant. Pipe boot replacement involves removing the old boot, cleaning the pipe and surrounding area, installing a new rubber or aluminum boot, and sealing the edges with roofing cement. Each of these repairs requires working on the roof surface, which presents fall hazards that make professional installation the safer and more reliable option for most homeowners.
For tile roofing systems, leak repair involves lifting the tiles surrounding the damaged area without breaking them, replacing the cracked or broken tile, and resealing the underlayment beneath. Tile is heavy and brittle, which makes walking on a tile roof without breaking additional tiles difficult for anyone without specific training. Metal roof leak repair targets failed fasteners, seam separations, or punctures, and involves resealing with compatible metal-specific sealant or replacing the affected panel section.
Can You Repair a Roof Leak From the Inside?
You can temporarily slow a roof leak from the inside by applying roofing cement or hydraulic cement to the point of entry visible in the attic, but an interior patch does not constitute a permanent repair. Water will continue to reach the roof deck from the exterior, and the moisture trapped between the interior patch and the exterior surface accelerates wood rot in the decking and rafters. An interior application buys hours or days of reduced dripping, not weeks or months of protection.
The only permanent repair addresses the leak from the exterior, where the roofing material, flashing, or sealant failed. Interior patches are strictly emergency measures for situations where weather or safety conditions prevent immediate exterior access.
What Is the Best Sealant for Roof Leaks?
The best sealant for roof leaks depends on the roofing material, but polyurethane-based roof sealant and rubberized asphalt roofing cement are the two most effective options for residential use. Polyurethane sealant (such as NovaPlex or Geocel) adheres to metal, shingles, flashing, and concrete, remains flexible through temperature changes, and resists UV degradation. Rubberized asphalt roofing cement (such as Henry or Black Jack) works well for sealing shingle edges, flashing joints, and pipe boot perimeters.
Silicone-based sealants are effective on metal roofing and flat roof membranes but do not adhere well to asphalt shingles. Matching the sealant chemistry to your roofing material prevents adhesion failure and premature cracking that reopens the leak within months of the initial repair.
How Much Does It Cost to Repair a Roof Leak?
Roof leak repair costs $150 to $1,500 for most homeowners in 2026, with the average repair falling between $400 and $950, according to data from Peak and Valley Roofing, HomeGuide, and SquareDash. The cost depends on the leak source, the roofing material, the extent of damage discovered during the repair, and whether the work is scheduled during normal hours or as an emergency call.
Leak Source
Typical Repair Cost
What Is Involved
Pipe boot replacement
$250 - $500
Remove old rubber boot, install new boot and seal edges
Missing/damaged shingles (small area)
$150 - $400
Replace 5-15 shingles, reseal edges
Flashing repair (vent or wall)
$200 - $600
Remove damaged flashing, install new with sealant
Chimney flashing repair
$300 - $950
Step flashing, counter flashing, mortar and sealant work
Skylight flashing repair
$300 - $800
Reseal or replace flashing around skylight frame
Valley repair
$400 - $1,000
Clear debris, repair or replace valley flashing and shingles
Structural/water damage repair
$1,000 - $6,000+
Decking replacement, rafter repair, mold treatment
Sources: HomeGuide (2026), Mr. Roofer Atlanta (2026), Peak and Valley Roofing (2026), Fixr.com (2026). Costs are national averages; Florida pricing may be higher due to code requirements and labor rates.
Emergency repairs cost 25 to 50% more than scheduled work because of urgent response requirements and off-hours labor rates, according to FoxHaven Roofing. Scheduling a leak repair during normal business hours and outside of peak storm-response periods keeps costs at the lower end of each range. After major storms, contractor demand surges and prices spike 15 to 30% due to limited crew availability, according to SquareDash's 2026 analysis.
When Should You Replace a Roof Instead of Repairing It?
You should replace a roof instead of repairing it when the roof is more than 15 to 20 years old, when leaks appear in multiple locations, when repair costs approach 30% or more of a full replacement cost, or when the roof deck shows widespread rot or structural damage. A single leak on an otherwise healthy 8-year-old roof is a clear repair candidate. Multiple leaks on a 20-year-old roof with curling shingles and granule loss signal that the roofing material has reached the end of its functional life.
The repair-versus-replacement decision comes down to a cost-per-remaining-year calculation. If a $1,200 repair extends a roof's life by 5 years, the cost is $240 per year of additional service. If a $15,000 roofing replacement provides 25 years of service, the cost is $600 per year. The repair wins on a per-year basis as long as the frequency of future repairs remains low. Once a roof requires two or more repairs per year, the cumulative cost typically exceeds the annualized cost of replacement, making a new roof the more economical path.
Widespread decking damage discovered during a repair also shifts the math. Replacing damaged plywood decking costs $2.20 to $3.00 per square foot, according to RoofingCalculator.com. If more than 25 to 30% of the deck needs replacement, the labor cost of removing and reinstalling the existing roofing material on top of the new decking approaches the cost of a full replacement with new material, which makes the replacement the better investment.
How Do You Prevent Roof Leaks?
You prevent roof leaks by scheduling annual professional inspections, keeping gutters and valleys clear of debris, replacing deteriorated pipe boots and sealants before they fail, trimming tree branches that overhang the roof, and addressing minor damage immediately after storms. Preventative maintenance is the most cost-effective strategy for avoiding the cascade of damage that follows an undetected leak.
An annual roof inspection catches cracked flashing, lifted shingles, and degraded pipe boots before they allow water entry. The cost of a professional inspection ($150 to $400) is a fraction of even the smallest leak repair, and it prevents the secondary damage (mold, wood rot, insulation loss, interior staining) that turns a $300 fix into a $5,000 problem. Homeowners in hurricane-prone areas benefit from scheduling inspections both before and after storm season to catch wind damage that may not be visible from the ground.
Gutter maintenance directly affects roof performance. Clogged gutters cause water to back up under the roofline, saturating the fascia board and the lower edge of the roof deck. Cleaning gutters twice per year (spring and fall) and installing gutter guards reduces this risk. Pairing a well-maintained roof with impact windows and properly sealed exterior openings creates a comprehensive weather envelope that protects the entire home during severe storms.
Does Homeowners Insurance Cover Roof Leaks?
Homeowners insurance covers roof leaks caused by sudden, covered events like hurricanes, hailstorms, fallen trees, and wind damage, but it does not cover leaks caused by normal wear and tear, aging, or deferred maintenance. The distinction between storm damage and maintenance failure is the key factor in whether a claim is approved or denied.
Storm damage that is reported and repaired promptly is typically covered under a standard homeowners policy, minus the deductible. A leak that was known to the homeowner and left unrepaired is almost always classified as a maintenance issue, which insurers exclude from coverage. Documenting damage with photographs immediately after a storm and filing the claim within the policy's reporting window protects your eligibility for reimbursement.
In Florida, many policies use percentage-based hurricane deductibles of 1 to 2% of the insured value rather than flat dollar amounts. On a $400,000 home, a 2% deductible means the homeowner pays the first $8,000 before coverage begins. Reviewing your policy's deductible structure and coverage limits before storm season helps avoid surprises. A current wind mitigation inspection (form OIR-B1-1802, updated April 2026) can reduce the windstorm portion of your premium by documenting features like roof-to-wall connections, roof shape, and secondary water barriers. Financing options including PACE programs can help cover the out-of-pocket cost of repairs or upgrades that insurance does not fully reimburse.
For commercial roofing properties, insurance policies often require documented maintenance records to approve claims. Keeping a log of inspections, repairs, and contractor invoices strengthens any future claim by demonstrating that the property owner maintained the roof in good condition.
Frequently Asked Questions
What Is the Best Thing to Put on a Leaking Roof?
The best thing to put on a leaking roof as an emergency measure is a heavy-duty polyethylene tarp (6 mil or thicker) secured over the damaged area with 2x4 boards or sandbags. For a more targeted temporary fix, roofing cement applied directly to the crack, gap, or lifted edge slows water entry until a permanent repair can be completed. Neither option replaces a professional repair, but both reduce interior damage during the hours or days before a contractor can respond.
How Long Does a Roof Leak Repair Take?
A roof leak repair takes 1 to 4 hours for most common fixes, including pipe boot replacement, shingle repair, and flashing resealing. More complex repairs involving chimney flashing, valley reconstruction, or decking replacement may take a full day. Emergency tarp installation takes 30 to 60 minutes. The repair itself is fast; the scheduling and inspection process before the repair often takes longer than the work itself.
Can a Small Roof Leak Be Fixed Without a Professional?
A small roof leak can sometimes be patched by a homeowner using roofing cement or a sealant applied to a visible crack or gap, but working on a roof surface presents fall hazards that make professional repair the safer option. An improperly sealed repair may appear to stop the leak temporarily while allowing moisture to continue reaching the deck and framing behind the patch, causing hidden damage that is more expensive to fix later.
What Happens If You Ignore a Roof Leak?
Ignoring a roof leak leads to a predictable cascade of worsening damage. Mold begins growing within 24 to 48 hours. Insulation loses effectiveness immediately. Drywall stains and softens within days. Wood decking and rafters begin rotting within weeks of continuous moisture exposure. Professional mold remediation costs $1,500 to $6,000, and structural wood rot repair costs $2,000 to $10,000, according to industry data from Palm Build Restoration and Hidalgo Brothers Roofing. A $300 repair left unaddressed for weeks can easily become a $5,000 to $10,000 restoration project.
How Often Should You Inspect Your Roof?
You should inspect your roof at least once per year and after every major storm event. In Florida and other hurricane-prone states, scheduling inspections both before and after storm season (before June 1 and after November 30) catches damage from wind, rain, and debris that may not be visible from the ground. A professional inspection with a licensed roofing contractor provides a documented condition report that supports insurance claims if storm damage occurs.
The Bottom Line
A roof leak is a time-sensitive problem. The 24 to 48 hours after water first enters your roof structure determine whether the damage stays small and affordable or escalates into mold remediation, structural repair, and interior restoration that costs thousands. Finding the leak early, containing the water immediately, and completing a permanent repair as soon as conditions allow keeps the total cost between $150 and $1,500 for most homeowners. Prevention through annual inspections, gutter maintenance, and prompt post-storm repairs is the most effective strategy for avoiding emergency situations altogether.
If you notice water stains on your ceiling, dripping in your attic, or missing shingles after a storm, acting within hours rather than days protects both your home and your budget. ASP Super Home has been repairing and replacing roofs across South Florida since 2006 with licensed, in-house crews. Call 786-933-9815 or request a free estimate to schedule an inspection.
Meet With a Project Manager
Your first conversation is with a Project Manager who takes the time to understand your goals, walk you through your options, and stays connected throughout your project — from the initial consultation through the final walkthrough.
.avif)
.avif)
.avif)
%201.avif)
Insights & Resources
Stay informed with expert tips on roofing materials, hurricane codes, repairs, and South Florida construction standards.



%201.avif)
%201%20(1).avif)

%201.svg)
%201%20(1)%20(1).png)
.png.png)
.png%20(1).png)
.png%20(2).png)
.avif)
.avif)


.png)
.svg)
.png)